


Urban design today is no longer just about drawing plans but is also about testing ideas, comparing scenarios, and understanding how a city performs before it is built. Density, climate, mobility, land use, and infrastructure are all variables. This is because architects are not solving one problem but balancing many at once. This is where Grasshopper becomes important. It allows designers to move from static drawings to systems that respond, adapt, and evolve.
But Grasshopper on its own is only a starting point. Its real strength comes from plugins. Each plugin adds a new way of thinking. Some bring environmental data into design while others simulate structure, manage large datasets, or help generate multiple options quickly.
For urbanism and masterplanning, this matters even more. This list brings together ten plugins that speed up work and are essential for urban planning.
1. Ladybug Tools (Ladybug, Honeybee, Dragonfly)

Difficulty: Intermediate
Prerequisite: Basic Grasshopper + understanding of climate data
If you are working on urban design, this is non-negotiable. Ladybug Tools brings the climate directly into your workflow and helps you read weather data. You can study sun paths, radiation, wind, and thermal comfort. Honeybee goes deeper, allowing full energy simulations using engines like EnergyPlus. Dragonfly scales this up to the district level, making it relevant for masterplanning.
Instead of designing first and testing later, you can design with data from the beginning. You can compare layouts based on solar exposure, test street orientations, or evaluate how density affects energy use.
Example
If you are planning a residential layout in a hot city, you can create two versions of the same plan, one with streets running east-west and another rotated slightly. Using Ladybug, you run a radiation analysis on both and immediately see that one option exposes building facades to much harsher afternoon sun.
In the next step, adjust building spacing and orientation until shaded areas increase and open spaces become more comfortable. Instead of guessing what feels cooler, you are making decisions based on actual data.
2. Kangaroo (Live Physics)

Difficulty: Intermediate
Prerequisite: Basic Grasshopper + understanding of vectors and forces
Kangaroo introduces physics into design and allows you to simulate forces like gravity, tension, and pressure in real time. At an urban scale, this is useful in unexpected ways. You can use it to relax street networks, optimize spacing between elements, or generate organic layouts that respond to constraints.
It is also valuable for form-finding in landscape and public spaces. Instead of forcing geometry, you let it settle into a stable state. The result often feels more natural and brings a sense of behavior into design.
Example
You are designing circulation for a large public district. Instead of drawing paths manually, you place key points like metro stations, entrances, plazas, and landmarks. Kangaroo treats these points as attractors. Paths begin to form between them, adjusting dynamically based on distance and interaction, and then you can tweak weights and see how routes shift in real time.
The result is a network that feels natural, like how people would actually move, instead of a rigid, pre-drawn grid.
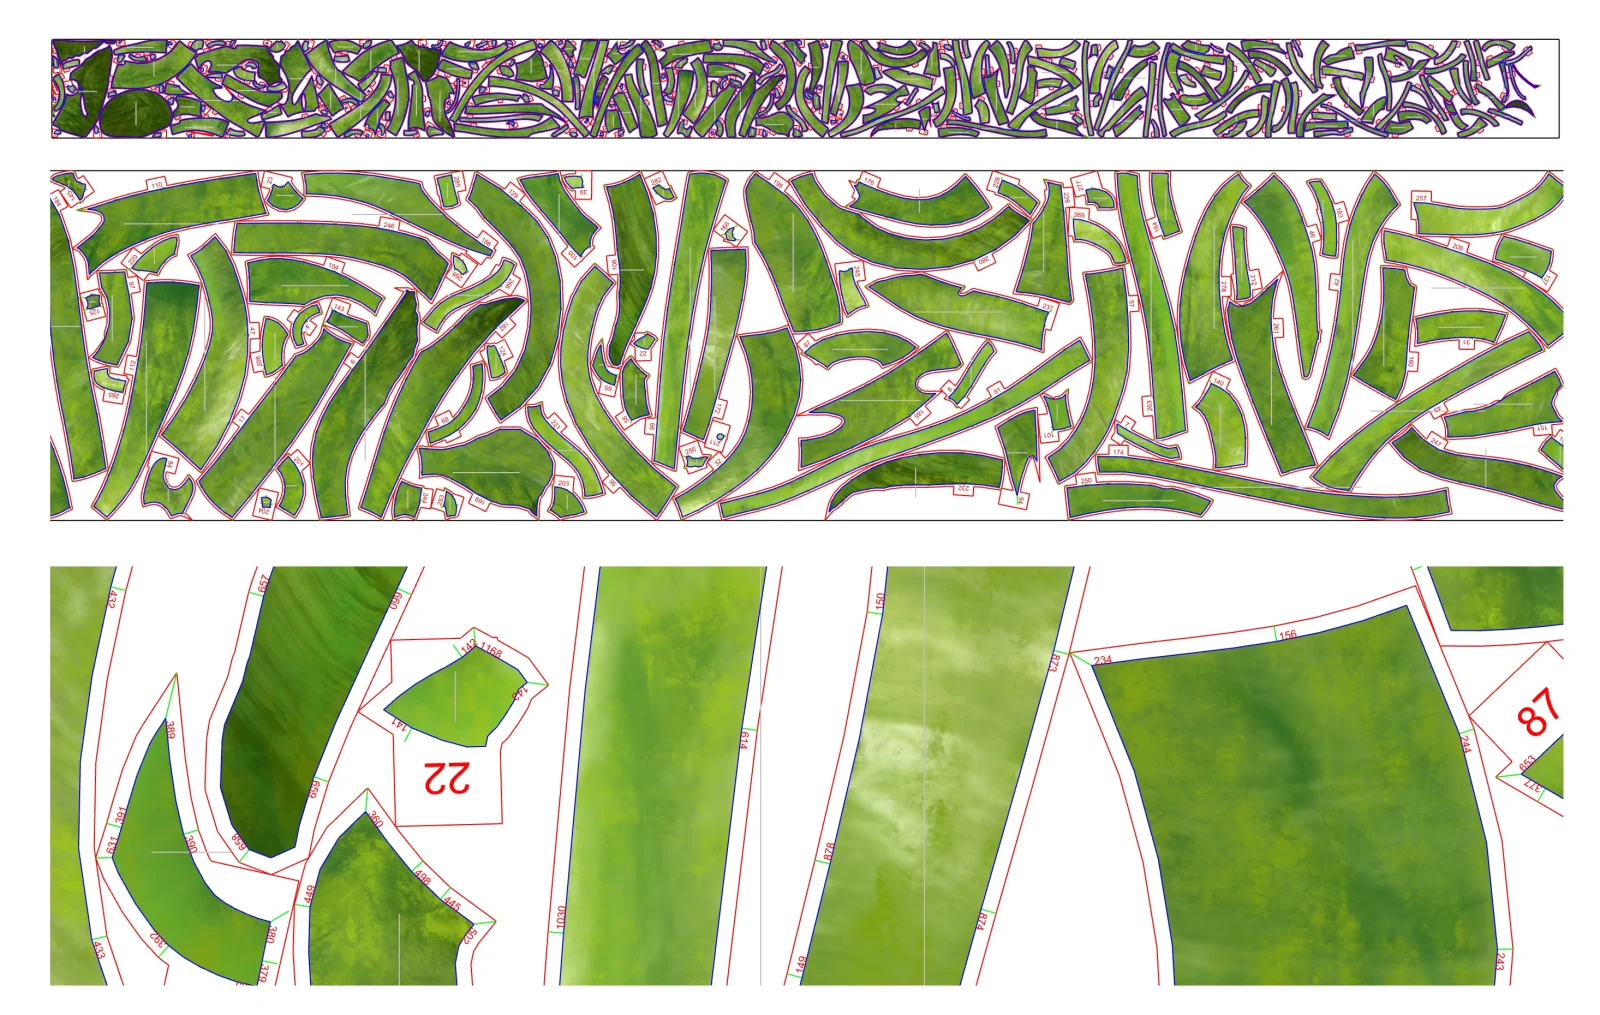
3. LunchBox

Difficulty: Beginner
Prerequisite: Basic Grasshopper (points, curves, surfaces)
LunchBox is one of the most widely used plugins for generating geometry and grids. In urban design, grids are everywhere. Plot divisions, block layouts, facade systems, and structural frameworks. LunchBox simplifies this by offering ready-made components for paneling and subdivision.
You can quickly generate different grid systems and test how they affect density, circulation, or visual rhythm. It is especially useful in early-stage masterplanning, where speed matters. It may seem simple, but it is one of the most practical tools in the workflow.
Example
You are working on a mixed-use site and want to test different block sizes. Instead of drafting each option, you generate a parametric grid using LunchBox and then connect the grid to parameters like plot width, road width, and setbacks. As you move a slider, the entire layout updates instantly.
You can quickly compare scenarios such as smaller blocks with more streets versus larger blocks with fewer roads and understand how each affects density and movement.
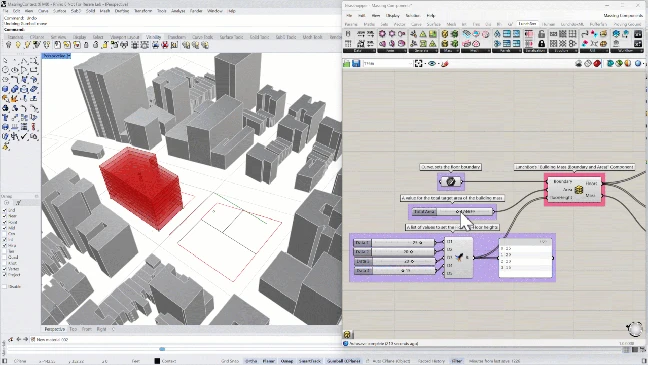
4. Karamba3D

Karamba3D brings structural thinking into the design stage. Instead of waiting for engineering validation later, you can test structural behavior while designing, analyze loads, optimize materials, and understand how different forms perform.
For urban projects, this is useful for large spans, bridges, pavilions, or complex building clusters. It helps ensure that what you design is not just visually interesting but also feasible.
Example
You design a large shaded plaza with a lightweight roof. Before finalizing the form, you run a quick structural analysis in Karamba, and then it shows areas where the structure bends too much or needs support. You adjust the geometry, maybe adding columns or changing thickness, and immediately see how performance improves.
This helps you avoid unrealistic designs and reduces back-and-forth later with engineers.
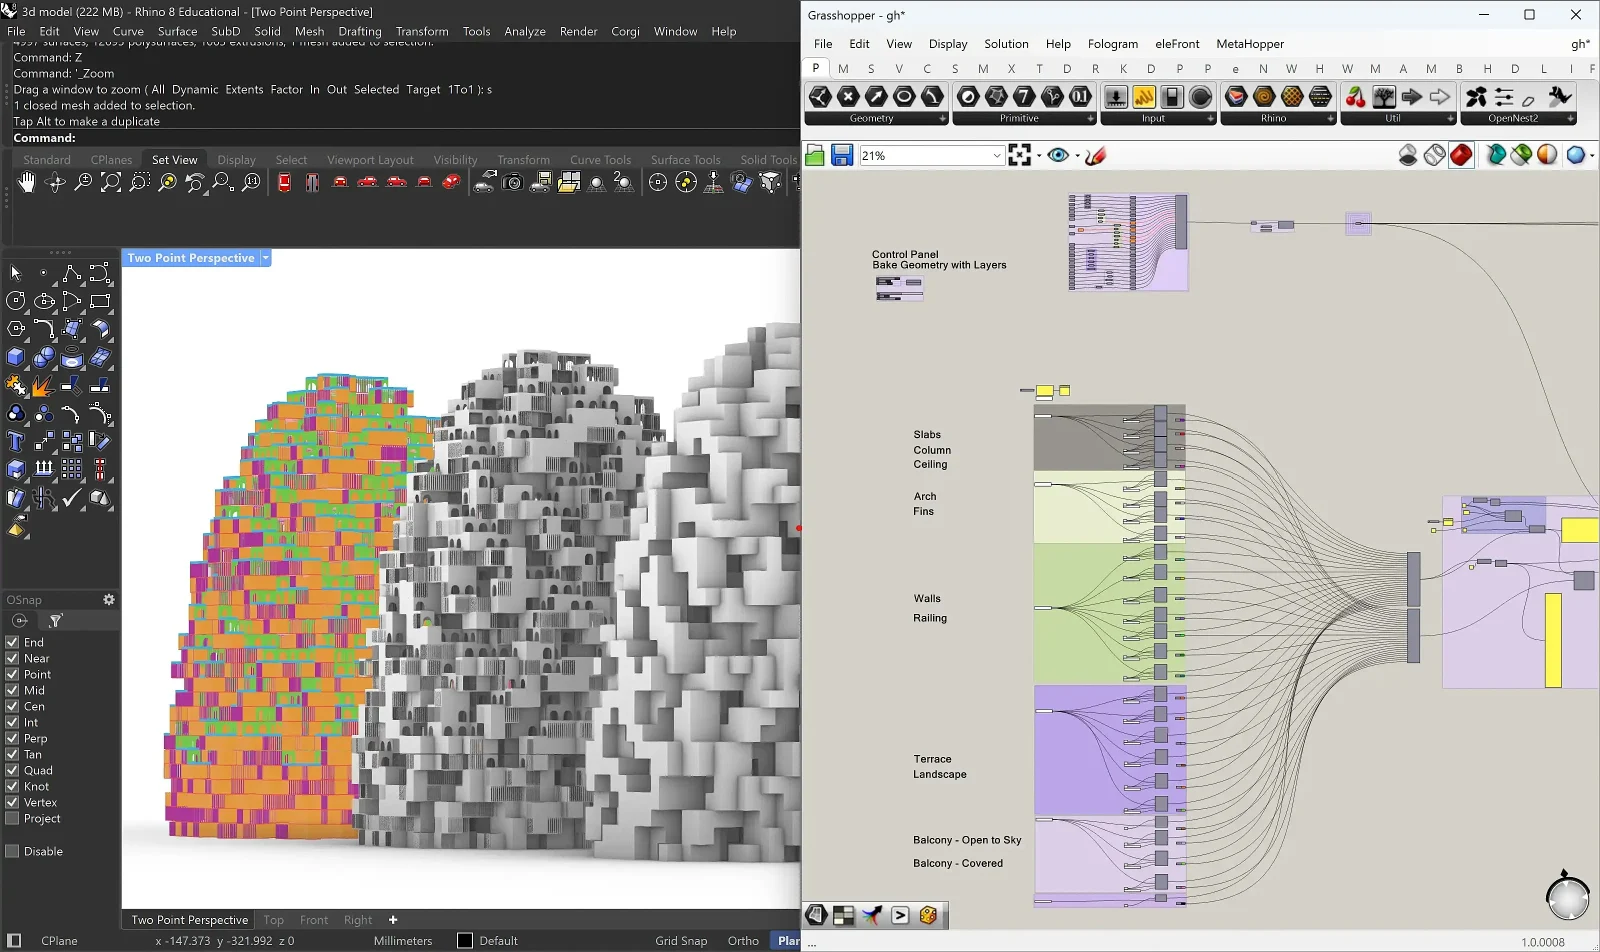
5. eleFront

Difficulty: Intermediate
Prerequisite: Grasshopper + understanding of data trees and attributes
Urban models quickly become heavy and difficult to manage because there are thousands of elements, each with its own data. Elefront helps you handle this complexity. It allows you to bake geometry with attributes, organize layers, and manage metadata efficiently.
This becomes critical in large projects where you need to track information such as land use, height, or zoning. It turns Grasshopper from a generative tool into a structured system. Without proper data management, parametric workflows break down. Elefront keeps them usable.
Example
You have a master plan with hundreds of buildings. Each one needs information like land use, height, and floor area. With Elefront, you assign this data directly to each building. Later, you can filter all residential buildings, change their height in one step, or export only commercial plots.
This keeps your model organized and makes it easier to move between design, analysis, and documentation.
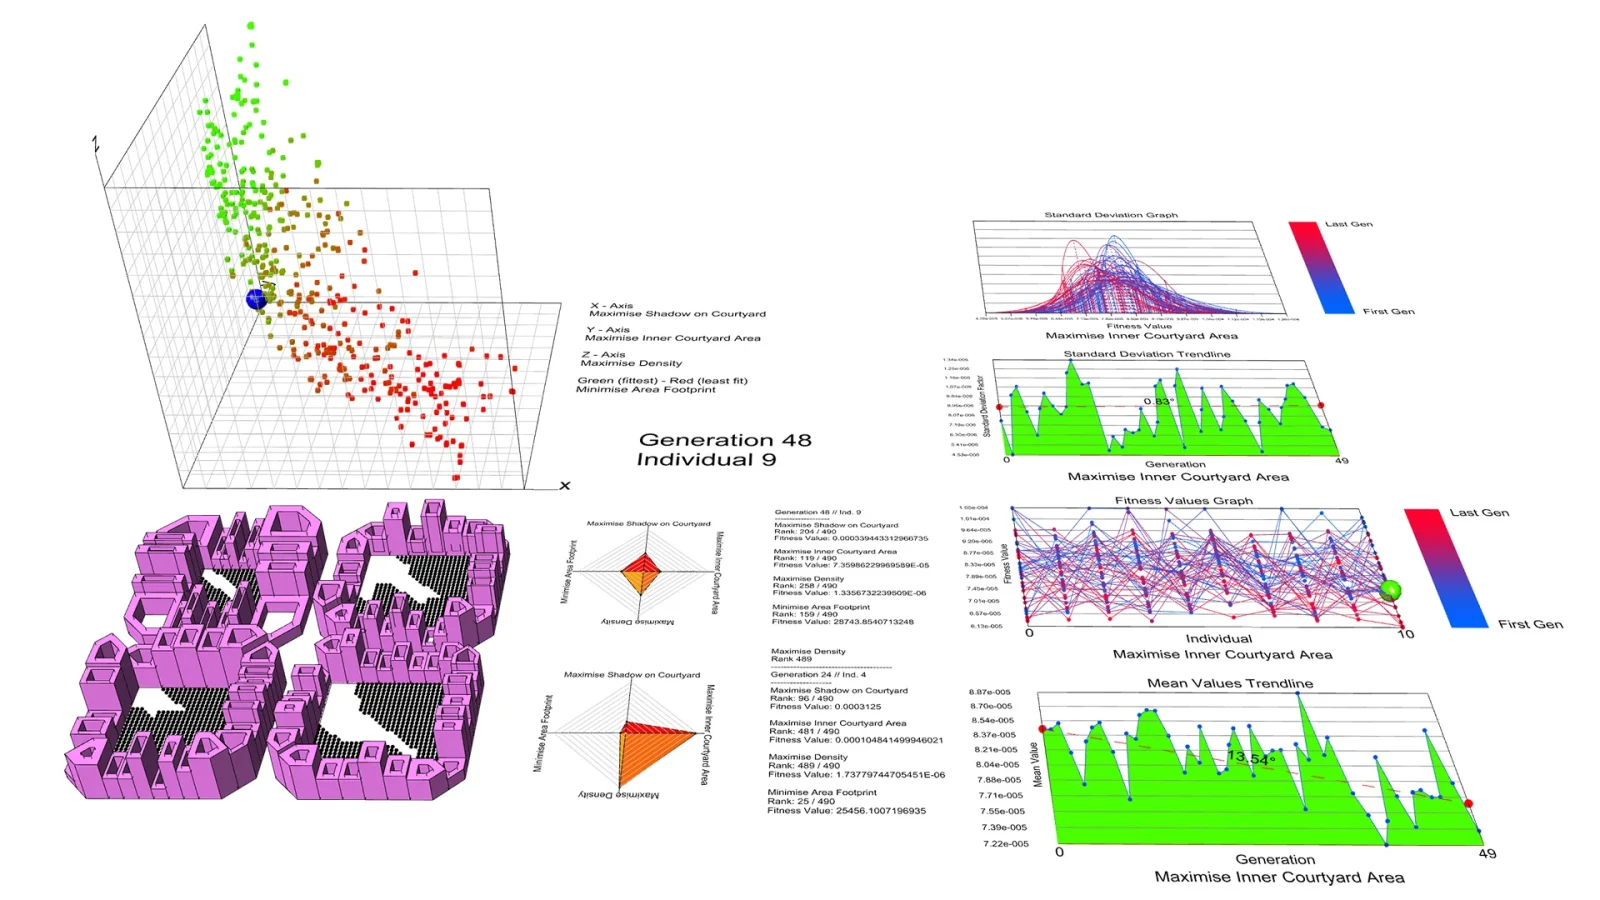
6. Wallacei

Difficulty: Advanced
Prerequisite: Grasshopper + understanding of parameters, fitness criteria
Wallacei allows you to explore multiple design options instead of settling on one. It uses evolutionary algorithms to generate and evaluate different solutions based on defined goals. For example, you can optimize for sunlight, density, and walkability at the same time.
Instead of manually testing options, the system evolves better solutions over time. You can then compare them using clear data. For master planning, this is extremely valuable as it supports decision-making.
Example
You want to design a housing layout that gets good daylight but also achieves a high density. You set these as goals in Wallacei. The system generates multiple variations of building placement and spacing. Each option is evaluated based on your criteria.
You then review the results and pick a solution that balances goals, instead of manually testing each option yourself.
7. Pufferfish

Difficulty: Intermediate
Prerequisite: Grasshopper + geometry manipulation basics
Pufferfish focuses on transformation as it allows you to morph, blend, and manipulate geometry in more flexible ways. In urban design, this can be used to explore variations in form, transition between different layouts, or create smoother spatial relationships.
It is particularly useful when working with non-linear or organic geometries. It helps move beyond rigid grids and introduces more fluid design possibilities.
Example
You are designing an area where a dense commercial zone merges with a quieter residential neighborhood. Instead of having an abrupt change, you gradually transition, building heights and forms.
Using Pufferfish, you morph one set of building volumes into another across the site. This creates a smoother urban transition and a more cohesive environment.
8. OpenNest

Difficulty: Beginner
Prerequisite: Basic Grasshopper + simple geometry handling
OpenNest is about efficiency. It helps arrange shapes most optimally. At first glance, it seems more suited to fabrication. But in urban design, it can be applied to site planning and land use distribution.
You can test how different building footprints fit within a site or optimize layouts to reduce unused space. It introduces a logic of packing and efficiency that can be useful in dense urban conditions.
Example
You are working on an irregularly shaped site. You have a set of building footprints that need to fit within it. Instead of placing them manually, OpenNest arranges them to minimize leftover space while respecting spacing rules.
This helps you maximize usable area and quickly test how much built-up space the site can accommodate.
9. Wasp

Difficulty: Advanced
Prerequisite: Grasshopper + understanding of modular systems and logic
Wasp is built around the idea of aggregation. It allows you to create systems composed of repeating modules that connect according to defined rules. This is highly relevant for urban design as cities grow through repetition and variation. Wasp lets you simulate this by building up complex systems from simple units.
It is useful for housing layouts, modular developments, or exploring growth patterns. Instead of designing everything manually, you define rules and let the system generate outcomes.
Example
You design a single housing unit and define how it can connect to others, side-by-side, stacked, or rotated. Wasp then generates multiple neighborhood layouts based on these rules. You can explore different growth patterns and densities without manually placing each unit.
This is especially useful for modular housing or large-scale residential planning.
10. Human UI

Difficulty: Beginner
Prerequisite: Basic Grasshopper (sliders, inputs, outputs)
Human UI changes how your work is presented and used. It allows you to build custom interfaces for your Grasshopper definitions. Sliders, buttons, and dashboards can be organized into a clean interface that non-designers can understand.
This is especially important in urban projects, where stakeholders are often not familiar with parametric tools. Instead of showing complex scripts, you present a simple interface where they can test options themselves. It makes parametric design more accessible and collaborative.
Example
You are presenting a master plan to a client or planning authority. Instead of showing a complex Grasshopper script, you create a simple interface with sliders. For example, “increase building height,” “reduce open space,” or “change density.” As they adjust these, the model updates in real time.
This turns your design into an interactive tool, making it easier for non-designers to understand and participate.
Explore Courses


.jpg "Ondrej Chybik - Rethinking Architecture")


